firebaseの登録
Androidの設定
project選択して、androidのアイコンをクリック

aplicationIDを入力
flutterフォルダから android > app > build.gradleファイルを開く
build.gradleの中程に、android {} で囲われた中の defaultConfig {} の中の applicationIdをコピー。
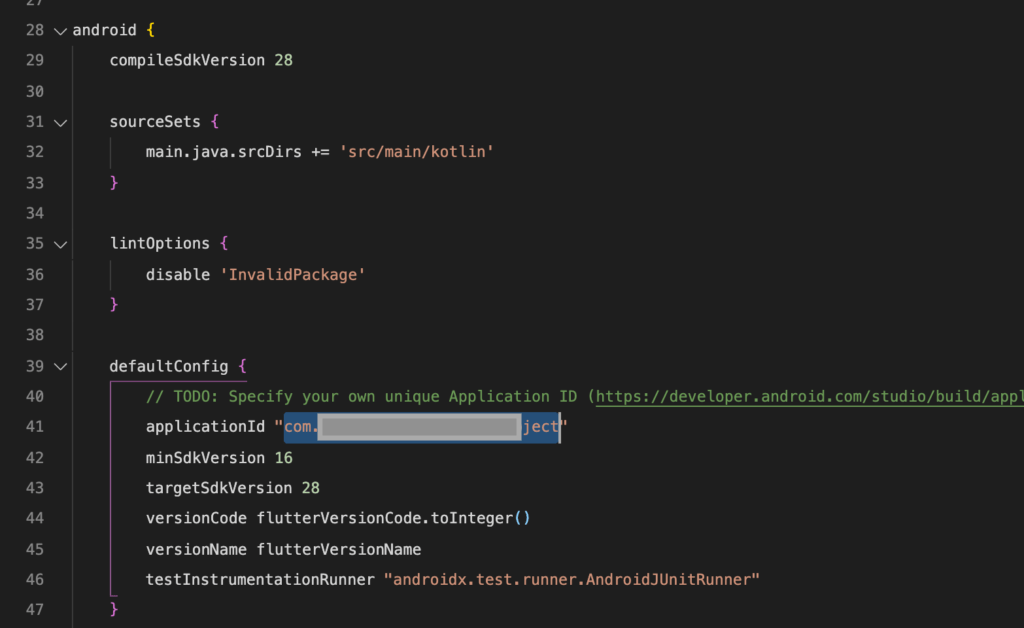
アプリの登録Android のパッケージ名にはいりつける。
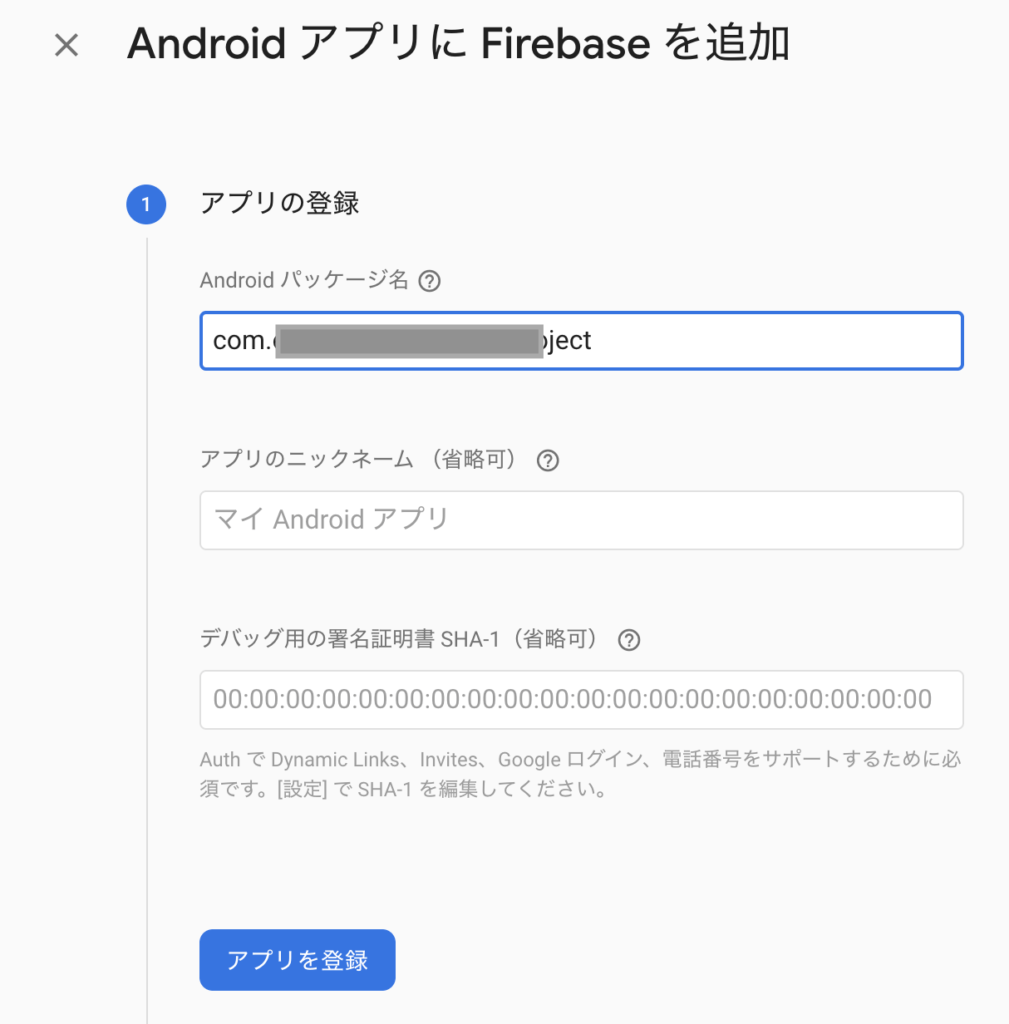
アプリを登録をクリック。
google-services.jsonファイルをダウンロード
設定ファイルのダウンロードのしたの「google-services.jsonをダウンロード」をクリックしてダウンロード。

jsonファイルをプロジェクトに取り込む
ダウンロードしたjsonファイルをandroidフォルダのappフォルダにアップロード。(androidstudioならドラック&ドロップで出来る。vscodeならファイルコピーして貼り付けとかしないと読み込まれない??)
この際、「Add file to git 」と出てきたら「NO」をクリックして下さい。
gitでバージョン管理している場合は、gitignore に「google-services.json」を足しておけば良いと思います。
次へのボタンをクリック。
google-services.json ファイルを読み込む
画像真ん中の、「classpath ‘com.google.gms:google-services:4.3.2’」をコピー

android > app > gradle/wrapper > build.gradleファイルの dependencies {}の中に貼り付ける

今度は、implementation の列をコピー

android > app > buil.gradleファイルのdependencies{}内に貼り付ける

先ほどコピーした上にある、「apply plugin」の列をコピー
そして、dependenciesの外側に貼り付ける

ターミナルで「flutter packages get」を実行
ここでエミュレーターを起動。しかしエラーが出た。。
FAILURE: Build failed with an exception.

* What went wrong:
Execution failed for task ':app:processDebugGoogleServices'.
> File google-services.json is missing. The Google Services Plugin cannot function without it.
androidstudioで見てみるとgoogle-services.jsonファイルが入っていなかったので、androidstudioにファイルをドラック&ドロップした
エミュレータでAndroidを実行して立ち上がればOK
次へ進んで終了。
iosの設定
アプリを追加
コンソール画面に戻るので「アプリを追加」をクリック。
iosのアイコンを選択。
iosバンドルIDの設定

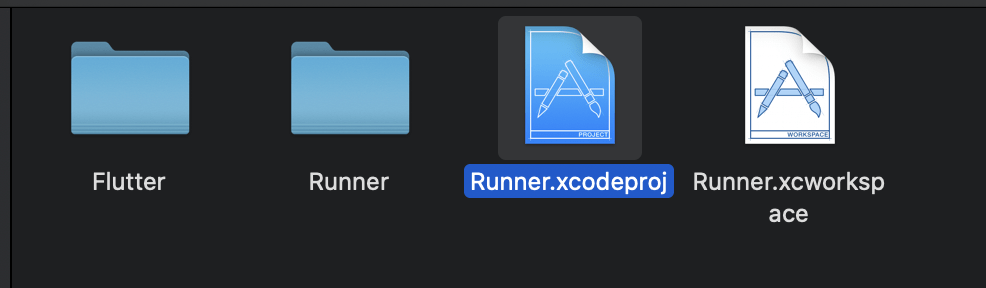
ios > Runner で右クリック。
finderで開く。「Runner.xcodeproj」をダブルクリックでxcodeを開く。
Bundle identifierをコピー
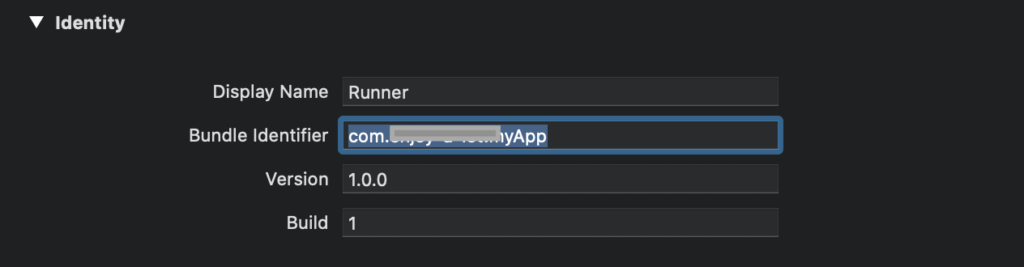
iosバンドルIDに貼り付ける
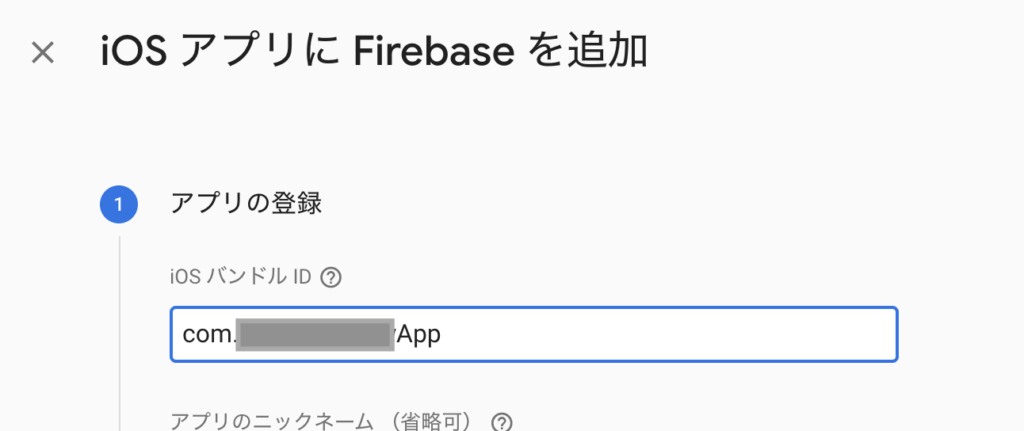
アプリを登録ボタンをクリック
設定ファイルのダウンロード
「GoogoleService-Info.plistをダウンロード」をクリックしてダウンロード

ダウンロードしたフォルダをRunnnerフォルダに入れる。
その際、「copy items if needed」と「Add to targets」にチェックを入れる。
xcodeを閉じる。firebaseに戻って「次へ」をクリック。
エディターからiosのエミュレーターで実行する。以上
パッケージのセットアップ
githubへ
https://github.com/FirebaseExtended/flutterfire
firebase_core
githubのページをスクロールすると、firebaseのいろいろなパッケージがあります。
その中から「firebae_core」をクリックします。
タブを「install」に切替バージョン情報をコピー

pubspec.yamlファイルを開き、「dependencies:」に貼り付け

同じ手順で必要な物をペーストしていく。
最後に、「packages get」をクリック。もしくはターミナルより「flutter pub get」を実行。

エミュレーターを一度完全に終了してから再実行。
android側で「Cannot fit requested classes in a single dex file」というエラーが出ました。
app > build.gradleファイルの「defaultConfig」に multiDexEnabled true を書き加えると解決しました。
参考記事(https://minpro.net/android-64k-problems)
あとは各エミュレータで立ち上げ、無事立ち上がれば終了ー!!